
Qwiklabs ML APIs - 2. Extract, Analyze, and Translate Text from Images with the Cloud ML APIs
Overview
In this lab, we’ll explore the power of machine learning by using multiple machine learning APIs together. We’ll start with the Cloud Vision API’s text detection method to make use of Optical Character Recognition (OCR) to extract text from images. Then we’ll learn how to translate that text with the Translation API and analyze it with the Natural Language API.
What you’ll learn
-
Creating a Vision API request and calling the API with curl
-
Using the text detection (OCR) method of the Vision API
-
Using the Translation API to translate text from your image
-
Using the Natural Language API to analyze the text
Create an API Key
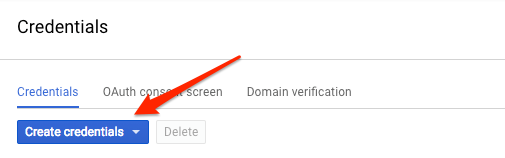
Since you’ll be using curl to send a request to the Vision API, you’ll need to generate an API key to pass in your request URL. To create an API key, navigate to:
APIs & services > Credentials:
 001.png
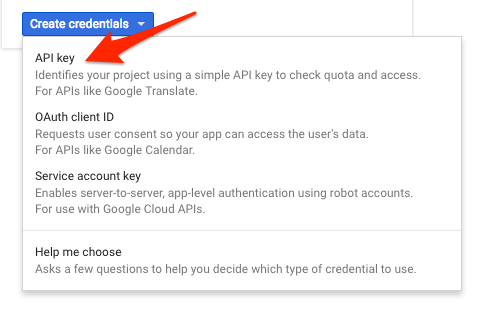
Then click Create credentials:
 002.png
In the drop down menu, select API key:
 003.png
Next, copy the key you just generated. Click Close.
Now that you have an API key, save it to an environment variable to avoid having to insert the value of your API key in each request. You can do this in Cloud Shell. Be sure to replace
1
export API_KEY=<YOUR_API_KEY>
Upload an image to a cloud storage bucket
Creating a Cloud Storage bucket
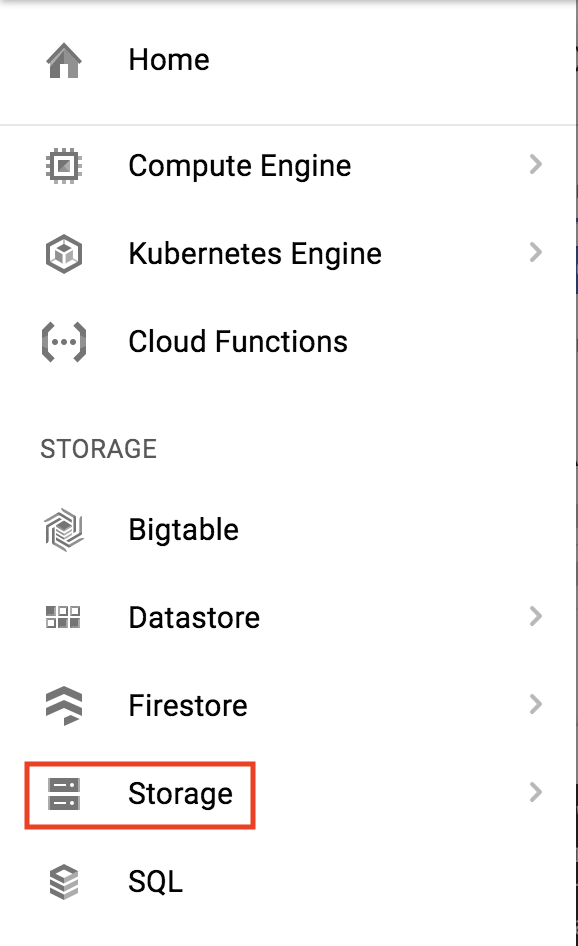
There are two ways to send an image to the Vision API for image detection: by sending the API a base64 encoded image string, or passing it the URL of a file stored in Google Cloud Storage. For this lab you’ll create a Google Cloud Storage bucket to store your images.
Navigate to the Storage browser in the Cloud console:
 004.png
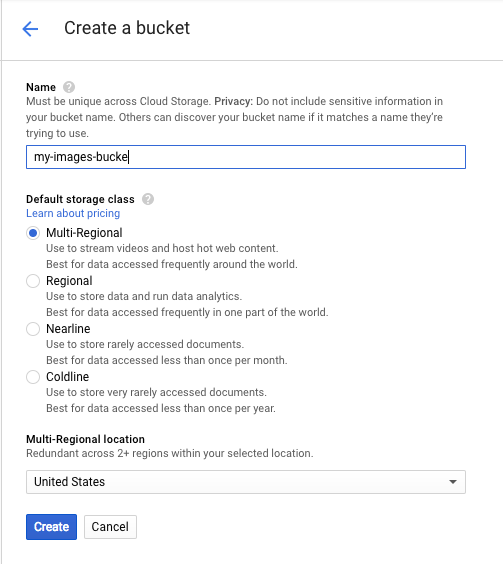
Then click Create bucket.
Give your bucket a globally unique name and click Create.
 005.png
Upload an image to your bucket
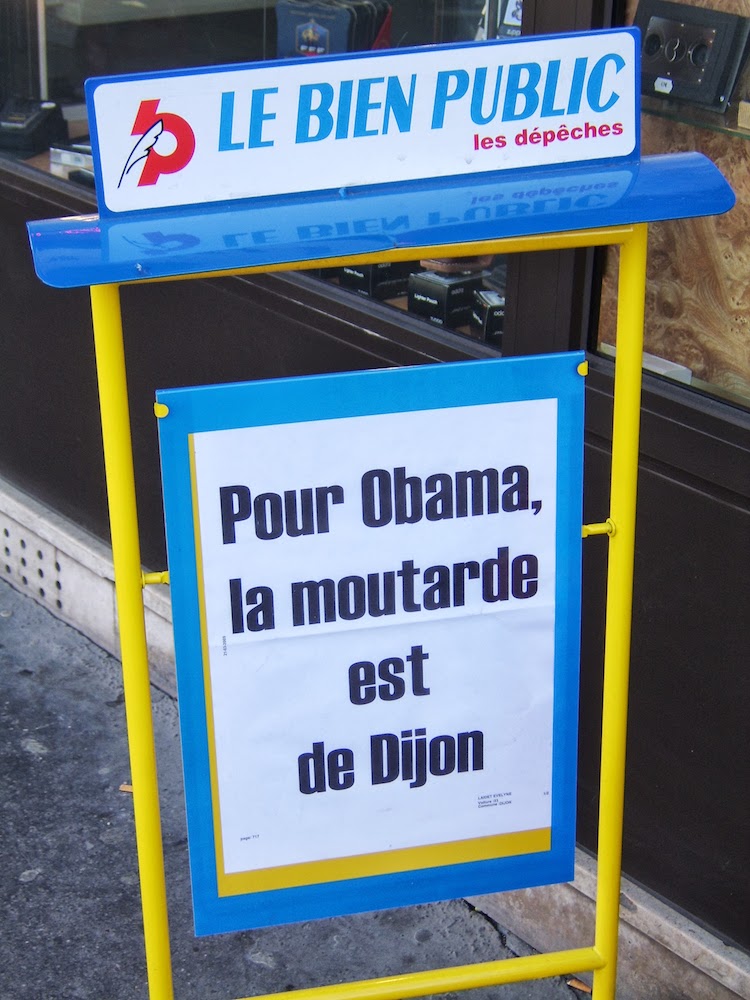
Right click on the following image of a French sign, then click Save image as and save it to your computer as sign.jpg.
 006.jpeg
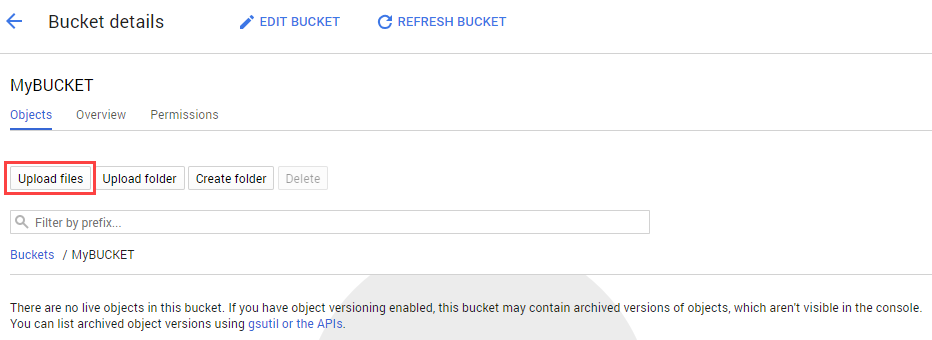
Navigate to the bucket you just created in the storage browser and click Upload files. Then select sign.jpg.
 007.png
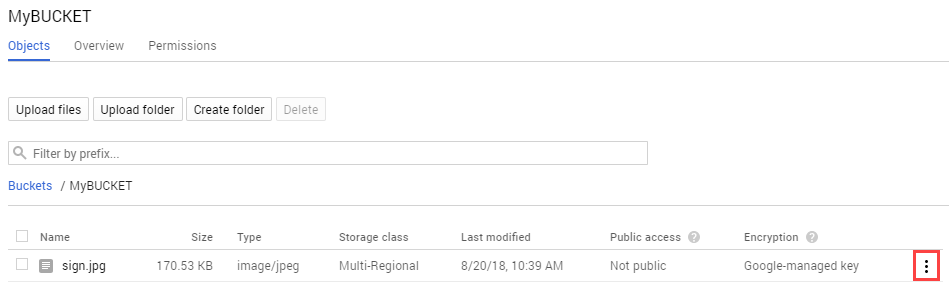
Next you’ll allow the file to be viewed publicly while keeping the access to the bucket private.
Click on the 3 dots for the image file:
 008.png
Select Edit Permissions.
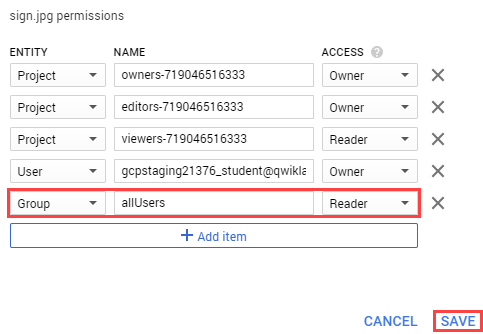
Now click Add Item and set the following:
- Select “User” for the Entity.
- Type “allUsers” for the Name.
- Select “Reader” for the Access.
 009.png
Click Save.
You’ll now see that the file has public access.
Now that you have the file in your bucket, you’re ready to create a Vision API request, passing it the URL of this picture.
Create your Vision API request
In your Cloud Shell environment, create an ocr-request.json then add the code below to the file, replacing my-bucket-name with the name of the bucket you created. You can create the file using one of your preferred command line editors (nano, vim, emacs) or click the pencil icon to open the code editor in Cloud Shell:
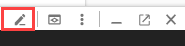 010.png
Add the following to your ocr-request.json file:
1
2
3
4
5
6
7
8
9
10
11
12
13
14
15
16
17
{
  "requests": [
      {
        "image": {
          "source": {
              "gcsImageUri": "gs://my-bucket-name/sign.jpg"
          }
        },
        "features": [
          {
            "type": "TEXT_DETECTION",
            "maxResults": 10
          }
        ]
      }
  ]
}
You’re going to use the TEXT_DETECTION feature of the Vision API. This will run optical character recognition (OCR) on the image to extract text.
Call the Vision API’s text detection method
In Cloud Shell, call the Vision API with curl:
1
curl -s -X POST -H "Content-Type: application/json" --data-binary @ocr-request.json  https://vision.googleapis.com/v1/images:annotate?key=${API_KEY}
The first part of your response should look like the following:
1
2
3
4
5
6
7
8
9
10
11
12
13
14
15
16
17
18
19
20
21
22
23
24
25
26
27
28
29
30
31
32
33
34
35
36
37
38
39
40
41
42
43
44
45
46
47
48
49
50
51
52
53
54
55
56
57
58
59
60
61
62
63
64
65
66
67
68
{
  "responses": [
    {
      "textAnnotations": [
        {
          "locale": "fr",
          "description": "LE BIEN PUBLIC\nles dépeches\nPour Obama,\nla moutarde\nest\nde Dijon\n",
          "boundingPoly": {
            "vertices": [
              {
                "x": 146,
                "y": 48
              },
              {
                "x": 621,
                "y": 48
              },
              {
                "x": 621,
                "y": 795
              },
              {
                "x": 146,
                "y": 795
              }
            ]
          }
        },
        {
          "description": "LE",
          "boundingPoly": {
            "vertices": [
              {
                "x": 146,
                "y": 99
              },
              {
                "x": 274,
                "y": 85
              },
              {
                "x": 284,
                "y": 175
              },
              {
                "x": 156,
                "y": 189
              }
            ]
          }
        },
        {
          "description": "BIEN",
          "boundingPoly": {
            "vertices": [
              {
                "x": 292,
                "y": 83
              },
              {
                "x": 412,
                "y": 70
              },
            }
            ...
      ]
}]
}
The OCR method is able to extract lots of text from our image, cool! Let’s break down the response. The first piece of data you get back from textAnnotations is the entire block of text the API found in the image. This includes the language code (in this case fr for French), a string of the text, and a bounding box indicating where the text was found in our image. Then you get an object for each word found in the text with a bounding box for that specific word.
Note: The Vision API also has a DOCUMENT_TEXT_DETECTION feature optimized for images with more text. This response includes additional information and breaks text down into page, blocks, paragraphs, and words.
Unless you speak French you probably don’t know what this says. The next step is translation.
Run the following curl command to save the response to an ocr-response.json file so it can be referenced later:
1
curl -s -X POST -H "Content-Type: application/json" --data-binary @ocr-request.json  https://vision.googleapis.com/v1/images:annotate?key=${API_KEY} -o ocr-response.json
Sending text from the image to the Translation API
The Translation API can translate text into 100+ languages. It can also detect the language of the input text. To translate the French text into English, all you need to do is pass the text and the language code for the target language (en-US) to the Translation API.
First, create a translation-request.json file and add the following to it:
1
2
3
4
{
  "q": "your_text_here",
  "target": "en"
}
q is where you’ll pass the string to translate.
Save the file.
Run this Bash command in Cloud Shell to extract the image text from the previous step and copy it into a new translation-request.json (all in one command):
1
STR=$(jq .responses[0].textAnnotations[0].description ocr-response.json) && STR="${STR//\"}" && sed -i "s|your_text_here|$STR|g" translation-request.json
Now you’re ready to call the Translation API. This command will also copy the response into a translation-response.json file:
1
curl -s -X POST -H "Content-Type: application/json" --data-binary @translation-request.json https://translation.googleapis.com/language/translate/v2?key=${API_KEY} -o translation-response.json
Run this command to inspect the file with the Translation API response:
1
cat translation-response.json
Awesome, you can understand what the sign said!
1
2
3
4
5
6
7
8
9
10
{
  "data": {
    "translations": [
      {
        "translatedText": "THE PUBLIC GOOD the despatches For Obama, the mustard is from Dijon",
        "detectedSourceLanguage": "fr"
      }
    ]
  }
}
In the response, translatedText contains the resulting translation, and detectedSourceLanguage is fr, the ISO language code for French. The Translation API supports 100+ languages, all of which are listed here.
In addition to translating the text from our image, you might want to do more analysis on it. That’s where the Natural Language API comes in handy. Onward to the next step!
Analyzing the image’s text with the Natural Language API
The Natural Language API helps us understand text by extracting entities, analyzing sentiment and syntax, and classifying text into categories. Use the analyzeEntities method to see what entities the Natural Language API can find in the text from your image.
To set up the API request, create a nl-request.json file with the following:
1
2
3
4
5
6
7
{
  "document":{
    "type":"PLAIN_TEXT",
    "content":"your_text_here"
  },
  "encodingType":"UTF8"
}
In the request, you’re telling the Natural Language API about the text you’re sending:
type: Supported type values are PLAIN_TEXT or HTML.
content: pass the text to send to the Natural Language API for analysis. The Natural Language API also supports sending files stored in Cloud Storage for text processing. To send a file from Cloud Storage, you would replace content with gcsContentUri and use the value of the text file’s uri in Cloud Storage.
encodingType: tells the API which type of text encoding to use when processing the text. The API will use this to calculate where specific entities appear in the text.
Run this Bash command in Cloud Shell to copy the translated text into the content block of the Natural Language API request:
1
STR=$(jq .data.translations[0].translatedText  translation-response.json) && STR="${STR//\"}" && sed -i "s|your_text_here|$STR|g" nl-request.json
The nl-request.json file now contains the translated English text from the original image. Time to analyze it!
Call the analyzeEntities endpoint of the Natural Language API with this curl request:
1
2
curl "https://language.googleapis.com/v1/documents:analyzeEntities?key=${API_KEY}" \
  -s -X POST -H "Content-Type: application/json" --data-binary @nl-request.json
In the response you can see the entities the Natural Language API found:
1
2
3
4
5
6
7
8
9
10
11
12
13
14
15
16
17
18
19
20
21
22
23
24
25
26
27
28
29
30
31
32
33
34
35
36
37
38
39
40
41
42
43
44
45
46
47
48
49
50
51
52
53
54
55
56
57
58
59
60
61
62
63
64
65
66
67
68
69
70
71
72
73
74
75
76
77
78
79
80
81
82
83
84
85
86
87
88
89
90
{
  "entities": [
    {
      "name": "despatches",
      "type": "OTHER",
      "metadata": {},
      "salience": 0.31271625,
      "mentions": [
        {
          "text": {
            "content": "despatches",
            "beginOffset": 20
          },
          "type": "COMMON"
        }
      ]
    },
    {
      "name": "PUBLIC GOOD",
      "type": "OTHER",
      "metadata": {
        "mid": "/m/017bkk",
        "wikipedia_url": "https://en.wikipedia.org/wiki/Public_good"
      },
      "salience": 0.28040817,
      "mentions": [
        {
          "text": {
            "content": "PUBLIC GOOD",
            "beginOffset": 4
          },
        {
          "type": "PROPER"
        }
      ]
    },
    {
      "name": "Obama",
      "type": "PERSON",
      "metadata": {
        "wikipedia_url": "https://en.wikipedia.org/wiki/Barack_Obama",
        "mid": "/m/02mjmr"
      },
      "salience": 0.19405179,
      "mentions": [
        {
          "text": {
            "content": "Obama",
            "beginOffset": 35
          },
          "type": "PROPER"
        }
      ]
    },
    {
      "name": "mustard",
      "type": "OTHER",
      "metadata": {},
      "salience": 0.11838918,
      "mentions": [
        {
          "text": {
            "content": "mustard",
            "beginOffset": 46
          },
          "type": "COMMON"
        }
      ]
    },
    {
      "name": "Dijon",
      "type": "LOCATION",
      "metadata": {
        "mid": "/m/0pbhz",
        "wikipedia_url": "https://en.wikipedia.org/wiki/Dijon"
      },
      "salience": 0.09443461,
      "mentions": [
        {
          "text": {
            "content": "Dijon",
            "beginOffset": 62
          },
          "type": "PROPER"
        }
      ]
    }
  ],
  "language": "en"
}
For entities that have a wikipedia page, the API provides metadata including the URL of that page along with the entity’s mid. The mid is an ID that maps to this entity in Google’s Knowledge Graph. To get more information on it, you could call the Knowledge Graph API, passing it this ID. For all entities, the Natural Language API tells us the places it appeared in the text (mentions), the type of entity, and salience (a [0,1] range indicating how important the entity is to the text as a whole). In addition to English, the Natural Language API also supports the languages listed here.
Looking at this image it’s relatively easy for us to pick out the important entities, but if we had a library of thousands of images this would be much more difficult. OCR, translation, and natural language processing can help to extract meaning from large datasets of images.
Congratulations!
You’ve learned how to combine 3 different machine learning APIs: the Vision API’s OCR method extracted text from an image, then the Translation API translated that text to English and the Natural Language API to found entities in that text.
What we’ve covered
- Use cases for combining multiple machine learning APIs
- Creating a Vision API OCR request and calling the API with curl
- Translating text with the Translation API
- Extract entities from text with the Natural Language API
 Never miss a story from us, subscribe to our newsletter